Tuesday, February 28, 2012

More Aprons


Meg Apron

 The last couple of weeks I have been busy.  Doing what, I am not sure.  I guess that life has just gotten in the way of sewing and blogging.  I have finished two aprons; one was a mother, daughter, American Girl Doll apron, and one for a good friend.


Cute flap at the top of the apron.
The first apron was the “Meg Apron”, named after my daughter’s doll.  I made this apron for Valentines and it was a mother, daughter, and doll matching aprons.  I am not sure who was more excited, Meg (the doll), or my daughter.  This was my very first item to make using a store bought pattern.  Wow!  It took me three days for me to figure out the first step of the pattern, and I am not kidding.  I had to call Simplicity (the pattern maker) to get help.  By the way they called me right back and helped me out tremendously.  My mother also helped me out. 


I use my pockets to hold the phone when I am cooking.

I started with mine so that I could work out some of the kinks and ended with Meg’s.  I think that they turned out cute and now when “we” cook, we all look alike.  By the way, I finished the aprons about 2 hours after my daughter got home from school on Valentines Day.  I am still really, really slow.


Lucy Apron

The second apron that I made was the “Lucy Apron”, named after Lucile Ball.  It is a flirty and fun apron that was a birthday gift for a really good friend of mine who is flirty and fun.  This was another apron from a store bought pattern, but for the most it was not that complicated.  It was not lined and I really like my aprons lined, so the hard part was figuring out how to line it.  I think that when I lined it things did not really match up the way that they were supposed to, so there was some refiguring the pattern to get things to line up the way that they need to look correct.  It also seemed really big, so after completing it, I had to do some alterations.  So again, my seam ripper and I got to spend a lot of time together. 


I love Rick Rack!

 I just love the fabric on this one, and the flirty little ruffle on the bottom.  I am a big rick rack girl so I added rick rack and a pocket to the pattern.  At the moment I think that this one is my favorite.


Friday, February 17, 2012

Working out???


Working out is not one of my favorite things to do.  In fact I can come up with many excuses to get out of working out. 
In high school, working out was not such a big deal.  I ran track and was a cheerleader, so there was really no need to work out, it was build-in to my daily schedule.  In college, I went to the rec, rec-center, to work out so that I could meet boys (that is motivation for ya).  After graduation I was a flight attendant, and there was not much else I could afford to do on layovers, so working out for free was a pretty good idea.  It was not until I met Brad that I struggled with working out.  All of a sudden I had better options for my time, but I still wanted to work out and stay in shape.  Brad even bought me a lifetime plan to 24hr. Fitness, because I promised him that I would work out FOREVER.  Eleven years and 40 pounds later here I am.  Things did not go as planned, and now that Emma is 7, it is heard to pass off my weight as Baby Weight.
I am going to tell you that I have probably tried it ALL.  In fact I lost over 20 pounds on Weight Watcher once, and then summer came, and I put it all back on.
I am sure you already know that I am addicted to Pinterest (one of the reasons that I do not have time to work out).  Yesterday, I found a new workout plan that states I could lose a dress size and up to 12 pounds in 2 weeks.  Most of these are impossible workouts that I could not even keep up for one week, but this one is pretty much a 45 minute workout.  So I am trying it.  I am currently on Day 2.  I know that you are laughing, but this time I am really going to stick with it.  Here is the website where you can find the workout if you are interested http://www.prevention.com/print/26102 .  I will keep you informed on my progress.  Whish me luck, and let me know if you are trying it, and your progress.

Wednesday, February 15, 2012

Emma’s Valentine’s Day Party

Emma using her Chopsticks

Yesterday I got the privilege of helping at Emma’s Valentine’s Day Party.  Being a teacher and working full time I have never gotten to help out or attend any of Emma’s Valentine’s Parties or really any of Emma’s school or pre-school events because I always had events of my own and wouldn’t you know they usually occurred at the same time.  I know that you are really feeling sorry for me now.  I am feeling a little sorry for myself also.
Emma’s first grade teacher planned a “Fancy Lunch” for the kids.  She had reserved the Science Lab (we decorated it), and had the cafeteria put the kids lunch orders in the serving containers so that we could plate the kids orders on fancy plates and serve them.  She also brought heart cookie cutters so that we could use them to make the food look fancy.  For the kids that brought their lunches she used her cookie cutters and plated the food so that it even looked fancy.  The kids really loved it.  She even made a fancy dessert that looked like sushi, but was really a strawberry shortcake roll.  The kids got to use chopsticks, which was great.  They are first graders so I have pictures of them stabbing their food with the chopsticks and even using them as swards to play fight with friends.  Overall it was a great experience and made me appreciate the fact that I get to see and be a part of fun events like this great “Valentine’s Fancy Lunch.”
If any of you got to help out or attend your child’s Valentine’s Day Party I would really like to hear about it.  Please share by responding to this post.

Tuesday, February 14, 2012

Happy Valentine’s Day

Love!


I hope that everyone has a great Valentine’s Day filled with love and loved ones!

Sunday, February 12, 2012

Birthdays

Today is my husband’s birthday.  I am not sure about all husbands, but I do know that birthdays are a really big deal to my husband.  He claims that he gets a whole month for his birthday, and all month long uses the excuse that it is his "birthday month" to get out of anything (well, actually, he will use any excuse to get out if stuff all year long).  The rest of us are good to get a birthday day or maybe a birthday week, if we are real lucky. In fact, this year I had to buy my own birthday cake, which is a little depressing.  I love my husband, but when it comes to birthdays he is an “all about me guy”.
This is the first year where we did not hear all about “my birthday month”.  We did not even hear about a week or a day.  The activities that we planned were even very low keyed.  This is very unlike my husband.  I started to worry, but then I realized that he is getting closer to “40” and not as excited about drawing attention to himself, or at least I hope that is what is going on...
I do think that we had a great relaxing weekend.  In fact, I think that this weekend was one of my favorites.  If you are reading this Brad, I love you and, had a great weekend with you; Happy Birthday!

Wednesday, February 8, 2012

Valentine’s Day Shirt


Today I decided it was about time to start Emma’s Valentine’s Day shirt (nothing like waiting until the last minute).  On Pinetrerst, I had seen a really cute Valentine’s Day dress with a heart cut out and reverse appliqué heart to replace it.  It had cute ruffles, and I knew that I needed to try that.  Now, I am very new to sewing and did not realize how hard it is to cut a heart out of a t-shirt and to sew on a new heart under the t-shirt.  I think that this project was a little above my level, but I had already started, so onward I went. 
It is not purfect, but I still think that it is cute.

The first thing that I did was cut a heart out of the shirt (much harder than you think).  I then made a template of a heart out paper that was about a half an inch bigger than the cut out t-shirt heart.  I used that template to cut another heart out of cotton fabric.  Then I cut 2” strips of fabric and ruffled them (this is the fun part) and sewed them on the fabric heart.  After the fabric heart was full, I placed it under the hole shaped like a heart on the t-shirt, and sewed it on or under (???) the t-shirt (this was the frustrating part).  The good news was that after the frustrating part you are done and have forgotten the frustration.  How could you not?  Look at the cute shirt that you just created.
Happy Valentine’s Day!

Super Cute Drawstring Backpack (or at least I think that it is Super Cute)

I just finished this drawstring backpack last night.  I made it for my neighbor’s daughter.  She is on a select volleyball team and wanted a cute backpack to put her shoes and other volleyball items in for games and tournaments.  Her team’s colors are black and white (my favorite team colors).  Madison and her mom picked out the red canvas and the black and white zebra print.  I am not usually an animal print girl, but wow, it really pops on this red canvas. 
Tab to make a drawstring bag into backpack.
I tried to find a good drawstring backpack tutorial online, but was unable to find one.  I did find a drawstring string bag tutorial on the Martha Stewart website and decided to use that as a template and just modify it into a backpack.  Really all I had to do was add the tabs at the bottom and make the string longer to wrap through them.  I say “really”, but I was super close with my seam ripper again yesterday.
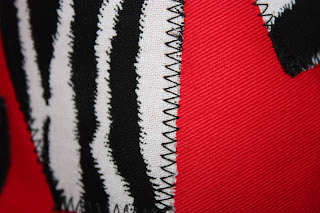


ZigZag Stich
For the lettering, I just found a font that I liked and increased the size to what I wanted, printed it, cut it out, and used it as a template for the fabric.  That was the easy part.  After cutting out the fabric and before sewing the bag together, I placed the letters and number on the fabric, pined it, and appliquéd it to the fabric.  I used the zigzag stich to appliqué.  I am not really good at that part, so there was a lot of seam ripping (again), and re-appliquéing.  One thing that I can say, is that I am really good a ripping out seams.


My new bestfriend:The Seam Ripper

The retractable blade is what makes it so good.


 I made the string out of the zebra fabric. I first made bias tape by cutting 2” strips out of the fabric.  I then folded the strips on the long sides in to meet in the middle and ironed it.  Then I folded the strips again in the middle, ironed, and sewed an edge s that the strips would not come unfolded while on the bag.
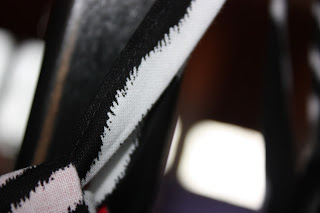
Homemade Bias Tape

Overall I think that the bag turned out really cute and hopefully Madison will really like he new drawstring backpack.
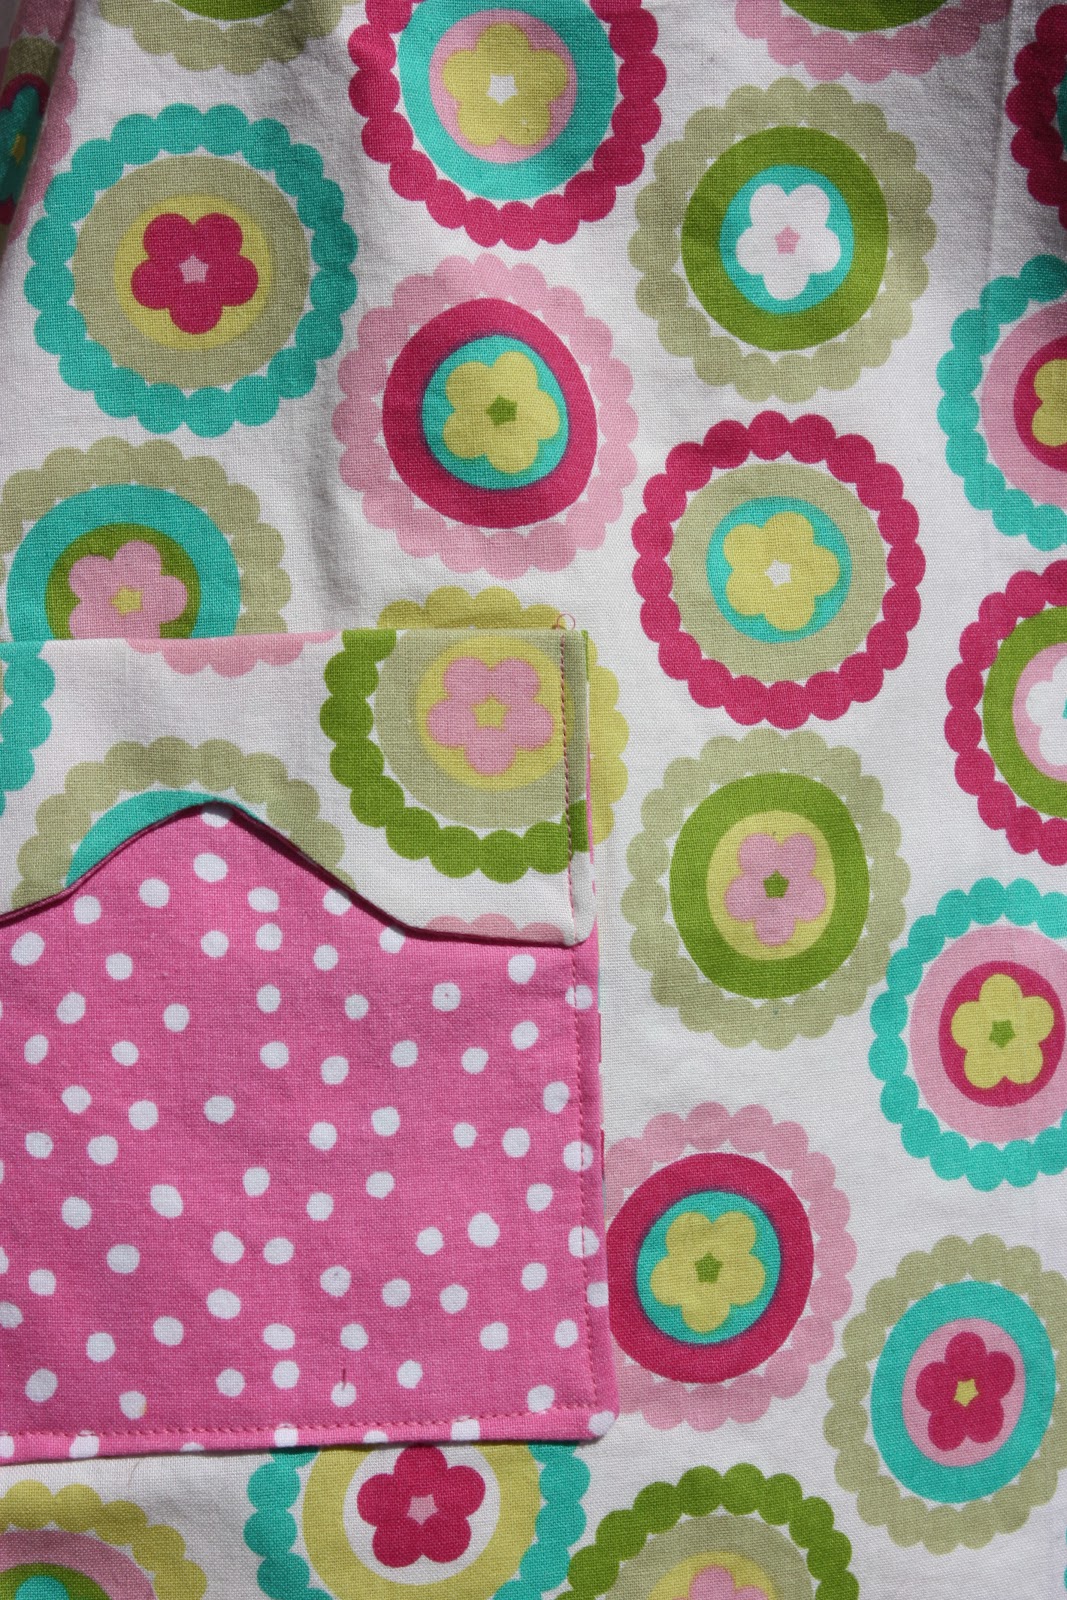
Monday, February 6, 2012

My First Apron

I have always loved aprons. 
Does it look like I live in a wooden cave?
 As you can see I might have a slight problem.    I have aprons that were my great-grandmothers, some were gifts,  and of course I have aprons for holidays.  One of the main reasons that I wanted to learn to sew is to be able to make my own aprons, and make cute shirts for Emma.  This weekend I decided to abandon my sewing class for a short while and try to make an apron.  I was having a hard time coming up with Valentine gift for Emma’s teacher, and I really have been wanting to make an apron, so I decided that was what I was going to do, make an apron for Emma’s teacher.  At first I just was going to make a Valentine half ruffle apron for Emma’s teacher (keeping it easy) using this pattern on “One More Moore”. The first problem was that our fabric store did not have a very good selection of Valentine’s fabric, and the second problem was that I really like full aprons.  I looked on line to find a full ruffle apron with a wrap bib and could not find one, but I found a wrap bib apron tutorial on “Sewing in No Mans Land”, and decided to combine the two.  I am not sure why I thought that it needed to have a wrap front, but for some reason in my mind it did.  I combined the two patterns and added a thicker waist and here it is, my first apron. What do you think?  I really like the fabric.


 I only took three days and many hours with my new seam ripper (that I love) to create.  I am thinking that for my next apron, I am going to use an actual pattern.

Thursday, February 2, 2012

Three Night and Three Different Meals with Grilled Chicken Breasts

On Tuesday I decided to grill 4 large chicken breasts that we were going to eat on for most of the week.  I always marinate my chicken breasts in either Kraft’s Sun Dried Tomato and Vinaigrette or Kraft’s Zesty Italian Dressings.  Normally I put the chicken breasts in a gallon Ziploc and marinate them for a couple of hours, but I forgot about dinner until about 5:00 and we usually eat around 6:00 or 6:30.  So, on Tuesday I simply put the chicken in a bowl and poured Kraft’s Sun Dried Tomato (I had more of it) on top to marinate while I was heating up the grill.  I usually grill the chicken because Brad likes to OVER cook the chicken, and he was not home yet.  Tuesday night was an easy meal.  All I did was warm up Missions Blue Corn and Flaxseed Tortillas (they are awesome), cut up a tomato, and avocado.  I had some leftover chicken, bean and corn stuff that we also put on top of our burrito.  You could easily use a can a black beans and corn to add some umph.  We only used 1 and a half chicken breasts and put the rest in the refrigerator for Wednesday.
Wednesday night was the special night, church night.  I made the Pioneer Woman’s Pizza Crust and pretty much used her Potato-Leek Pizza.  (If you have not heard of the Pioneer Woman, you really need to check out her website.)  I did make some substitutions because I not only do not have leeks, I do not know what they are.  (Hey, I spent most of my life working and not cooking.  That is probably apparent to you now.)  Instead of leeks I used 1 of my grilled chicken breasts and shredded it.  I also used turkey bacon instead of real bacon.  (We are supposed to be on a diet.)  I felt that my pizza lacked color, so I cut up two green onions to go on top.  I know that you working moms do not have enough time during the week to make pizza dough, but I used to make mine on the weekend and freeze it.  The recipe makes enough for two or three pizzas depending on how thin you like your crusts, and it is only 4 ingredients.
I know what you are thinking... 

Tonight I am planning on another easy meal.  I am going to slice the last chicken breast up, cook some more turkey bacon, slice up another tomato and avocado and make tasted sandwiches.  Sounds pretty good!  There you have it, three nights and three meals on grilled chicken breasts.  We are a family of 3, so if you have more you might want to grill more chicken breasts on the first night. Just saying...

Wednesday, February 1, 2012

The Fancy 100th Day Shirt

The Fancy 100th Day Shirt!


There really is a lot going on...

Today was the 100th day in first grade for Emma.  The first grade teachers decided to have a “100th Day Fashion Show”.  We were supposed to pick something and put 100 of them on a shirt or hat.  Emma wanted to do 100 buttons and I wanted to practice sewing, so we combined the two projects into one.  Fancy Nancy is one of Emma’s favorite characters, and I am thinking that Fancy Nancy would just love this shirt.  I had fun creating the shirt, but sewing 100 buttons on was a little more time consuming than I had planned.  I hope that she has a great 100th day at school!

I hope that you have a great day!